Installing a hard drive and CD/DVD burner is quite easy, and only takes a couple of steps to complete. If you have been following along with our custom PC build series, then you are nearing the final steps to assembling the PC. We’ve already talked about installing the graphics card and power supply, installing the RAM and motherboard, installing the CPU and the heat sink.
In fact, the CD/DVD burner and hard drive should be two of the only remaining parts left.
Installing a CD/DVD Burner Drive or Blu-ray Drive
Installing an optical drive is very simple, and simply involves removing a part on the front of the computer case, sliding the drive in, bolting it down, and connecting it to the motherboard. The basic steps for hooking up a CD/DVD/Blu-ray drive are as follows:
- Remove the bay cover so that you can slide in the optical drive. This will be a somewhat different process depending on which particular case that you chose for your build. However, removing the bay cover for most cases requires the same steps. Remove the drive cover by pushing from the inside of the case. The generic case cover should just pop out, leaving an open slot for which you will be able to install the CD/DVD/Blu-ray burner.
- Slide in the CD/DVD/Blu-ray burner drive. The drive should just slide right in. Never try and force the drive. If it’s difficult to push, check to make sure that there is nothing blocking the path from within the case.
- Once the CD/DVD/Blu-ray drive is sitting correctly in the bay, go ahead and fasten it down with screws. There should be 4-5 different screw holes located on the actual side of the drive, that will line up with 4-5 according screw holes in the casing. Secure the optical drive to the case.
- Connect the optical drive to the motherboard. Most likely, this will need to be done using a SATA cable that came with your motherboard. Simply plug one end into the back of the optical drive, and the other into an available SATA port on your motherboard. The other option, which is older but still sometimes used, is to connect the optical drive to the motherboard via IDE cable, which is a thin, ribbon like cable.
SATA Cable
IDE Cable
The majority of the time, you will also need to connect the CD/DVD/Blu-ray drive to the power supply.
How to Install a Hard Drive
Installing a hard drive is just as easy, if not easier, than installing a CD/DVD/Blu-ray drive. The basic steps for installing a hard drive are as follows:
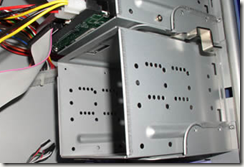
- Locate the hard drive storage bays within the case. Most often, these bays are positioned towards the front of the case, directly below the optical drive bays. However, like the rest of the build, this may very slightly, depending on the particular case that you are using.
- Once you have located the hard drive storage bays, slide in the internal hard drive, assuring that the connection end is facing towards the motherboard. Once the hard drive is positioned correctly within the bay, line up the holes in the bay with the holes in the side of the hard drive. Secure the hard drive to the case using some screws that should have come with the case.
- Finally, connect the hard drive to the motherboard using a SATA cable or IDE cable. Simply plug one end of the SATA or IDE cable into the back of the hard drive, and the other end into an open SATA or IDE input on the motherboard. You will also need to connect the hard drive to the power supply.
Now that you have the hard drive installed and optical drive installed, you may notice that there really aren’t anymore parts left. However, you still need to take some final steps before you can start installing the operating system. Be sure to continue on to the next article in our computer building series, where we will wrap up the build and provide some final notes and advice.


No comments:
Post a Comment