Making a PostSecret in Photoshop
step 1 Getting Started
These postcards can be as abstract as you want them. For your very first postsecret, we will keep things simple but bold.
Choose two contrasting pictures from your files. It does not matter the order in which you work with them.
Open Photoshop. Go to File>New. Under Document size, change the Width to 15.3cm, and the height 10.1cm. Then change the Resolution to 180 pixels/inch. This is the correct size for an average postcard.
Choose your first picture you would like to work with and open it. Once you have it open, go to Image > Image size. Under Document size, change the Width to 15.3cm, and the height 10.1cm. Then change the Resolution to 180 pixels/inch.
The picture is now the same size as your canvas.

step 2
You will notice this picture has now become your Background Layer, and as you know, Background layers can never be altered. Because we need access to this layer, drag the LOCK icon to the garbage bin. Re-name this layer PICTURE ONE.

step 3
Create a new layer (see notes for icon)
Now, open a second photo from your files. You will notice this photo will open in a new Photoshop document. Remember to size it according to the other photo (W: 15.3cm, H: 10.1cm, Res: 180 pixels/inch).
With your Rectangular Marquee Tool (see notes for icon), drag to select the entire photo, and copy it (CTRL+C).

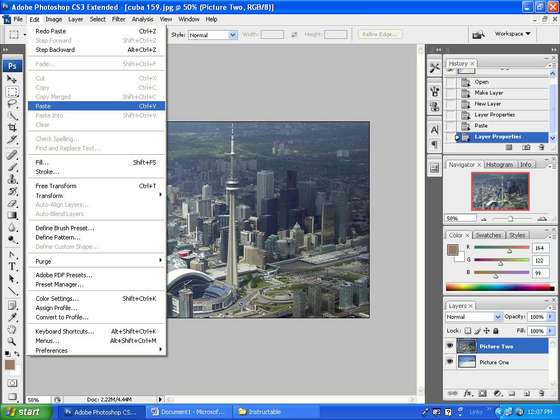
step 4
Paste the photo on the NEW LAYER you have created in your first document.
Rename this layer PICTURE TWO.
You should now have two layers with separate photos on them.
step 5
In order to have the two pictures merged together, we must play with the opacity of the picture located on the top layer. (In this case, it is PICTURE TWO)
In the layers box, you will see the Opacity scale (see notes for icon). For this document, I set the opacity to 30, as the top picture is much busier than the picture underneath. I wanted the picture underneath to show more than the top one.
You may change the order of your layers by simply dragging a layer on top of another one.

step 6
I want to flip the top picture, as the CN Tower looks too busy in the spot it is in now. I want it to be around the water area. So let's fix this.
To flip a picture, make sure you are on the correct layer (in this case PICTURE TWO layer). You then must go to EDIT>TRANSFORM>FLIP HORIZONTAL.
This will flip your image like a mirror.

step 7
Then go to EDIT>TRANSFORM>SCALE. This will allow you to change the scale of your picture.
In this case, I moved the picture to the left, then made it a little bigger, and stretched it Horizontally.
To keep the picture the same size (width and height), hold down the SHIFT key while making the image larger or smaller.

step 8
We are now going to add our secret.
Select the TEXT tool, and draw the text box somewhere on your picture. Choose a colour for your text. Next, choose a cool font which best represents the feeling of your design, and type your secret.
You may have to adjust the text size box if it is a long message.
Remember to type a secret which is 100% true and that nobody knows! This is completely anonymous!

step 9
You are now finished the design part of your PostSecret. Save this document as a JPEG, and print it. Then cut it out.
Next, take an existing postcard and glue your new design to the front. This way, when you turn the post card over, all that is left to do is write the address, and put a stamp on it!
Oh, don't forget to mail it!
Note: this is a completly anonoymous project. You are not required to put a return address on your PostSecret. Mail as many as you like! And remember to check the website every Sunday...who knows! You could see your secret up there one day!
PostSecret
13345 Copper Ridge Road
Germantown, MD
20874

No comments:
Post a Comment